Complete Guide to Becoming a Fullstack Kotlin Developer - scalable backend with KTOR
Simplify Your Mobile App Backend with KTOR

If you don’t know what KTOR is, I strongly recommend checking my last post KTOR as a backend, where I guide you through the project setup and building your first REST API. In this blog post, I will use a lot of code from the mentioned project and just add it to the different modules.
The complete project is avaiable on GitHub
Configuring the backend for the applications.
Firstly, we should start by adding some basic routing to ensure that everything is functioning correctly. Since we are building a GameShop application, one of the most critical endpoints will be the one that allows us to fetch all available games from our database. To achieve this, we need to configure the appropriate endpoint in our routing module.
Begin by defining a route that handles GET requests for fetching the list of games. This route will interact with our backend service to retrieve the game data and return it to the client in a structured format, such as JSON. Here is a simple example of how to set up this endpoint in KTOR:
Application.kt
fun Application.module() {
    configureRouting()
}
Routing.kt
fun Application.configureRouting() {
    install(Routing)

    routing {
        gamesRouting()
    }
}
GamesRoutes.kt
GamesRoutes.kt
fun Route.gamesRouting() {
route("/games") {
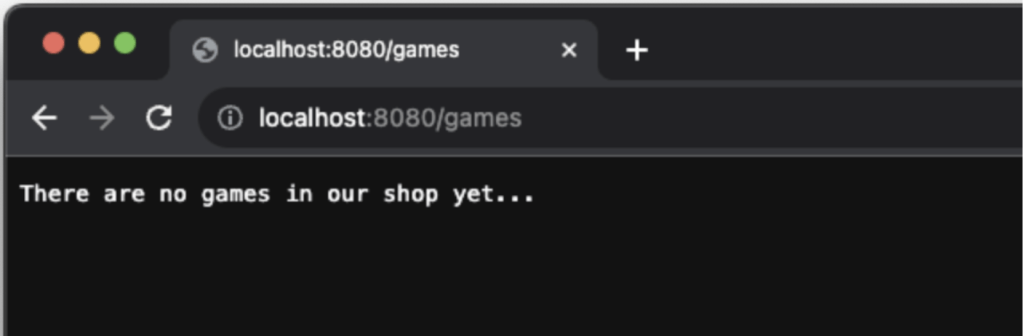
get {
call.respondText(text = "There are no games in our shop yet...", status=HttpStatusCode.OK)
}
}
}
We have established the most basic form of routing, ensuring that our server is operational and capable of delivering a placeholder response. This initial setup is crucial as it lays the foundation for more complex functionalities. By defining a simple GET endpoint, we can confirm that our routing configuration is correct and that the server can handle incoming requests without any issues.
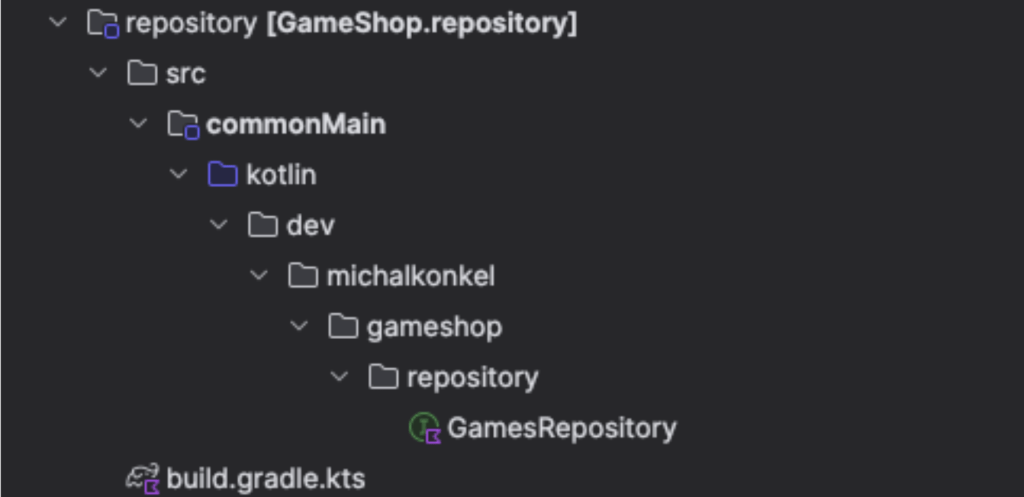
Now we need to think about how to utilize as much as possible from the KMM approach and be able to share as much code as possible with the backend and frontend applications. In general, our goal at this point is to use the same domain models and the same repositories (but with different implementations). I will create the domain and the repository as separate modules.
The shared/commonMain module will be designed to serve the frontend applications. This module will be responsible for implementing the domain models and the repository interfaces. Additionally, it will include a common HTTP client that can be used across all platforms, ensuring consistency and reducing redundancy in code.
The server module will be responsible for implementing the domain models and the repository interfaces. Unlike the frontend applications, which will use the shared/commonMain module, the server module will provide its own unique implementations of these interfaces. This means that while the frontend and backend will share the same domain models and repository interfaces, the actual logic for data retrieval and manipulation will differ between the two. The server module will handle backend-specific tasks such as database interactions, server-side processing, and business logic executio

Game.kt
data class Game(
    val name: String
)
GamesRepository.kt
interface GamesRepository {
    suspend fun getGames(): List<Game>
}
The backend will implement GamesRepository as DatabaseGamesRepository using H2 Database, while the apps will implement this repository as HttpGamesRepository and use the KTOR client to communicate with the server. This approach allows for good code separation and a significant amount of common code that can be widely used in the application.
We can start by creating the RealDatabaseGamesRepository. This class will implement the common GamesRepository interface but will interact with the database through the GamesDAOFacade. The GamesDAOFacade will serve as an abstraction layer, allowing us to perform database operations without exposing the underlying database implementation details. By doing so, we ensure that our repository remains decoupled from the specific database technology being used, making it easier to switch databases or update the database schema in the future. Additionally, this setup promotes better testability, as we can mock the GamesDAOFacade during unit testing to simulate various database behaviors and edge cases.
internal class RealDatabaseGamesRepository(
private val dao: GamesDAOFacade
) : GamesRepository {
    override suspend fun getGames(): List<Game> = dao.getGames()
}
If you want to know more about DI and Database in KTOR the full description is here.
We can now proceed to inject the repository into the routing mechanism of our application. By doing this, we enable our application to handle HTTP requests effectively. When a request is made to fetch game data, the routing will utilize the injected repository to retrieve the necessary information from the database. This approach ensures that our routing logic remains clean and focused on handling HTTP requests and responses, while the repository takes care of the data retrieval and manipulation.
fun Route.gamesRouting() {
    val repo by inject<GamesRepository>()
       get<GamesResources> {
          val games = repo.getGames()

            call.respond(
                status = HttpStatusCode.OK,
                message = games,
            )
        }
}
Following up on the KTOR blog post we will add:
JWT authentication
Administrator role
Login functionality
Game management endpoints
Orders endpoint
These topics will not be covered in this article as they can be found in the mentioned link.
Enhancements
Roles
To make this application a bit more interesting, we can add ROLES to users and then show or hide some functionalities on the frontend. For example, users will only be able to fetch games, but the administrator will be able to manage them. With this approach, we can create an MVP for content management. To do so, we need to implement roles. We can start with the shared domain object, the roles table, and a relation between users and roles.
domain/Role.kt
@Serializable
enum class Role {
    ADMIN,
    USER,
}
domain/User.kt
@Serializable
data class User(
    val id: String,
    val name: String,
    val username: String,
    val role: Role,
)

@Serializable
data class UserRequest(
    val name: String,
    val username: String,
    val password: String,
)
server/Roles.kt
object Roles : IntIdTable() {
    val name = varchar("name", 128)
}
server/Users.kt
object Users : UUIDTable() {
    ...
    val role = reference("role_id", Roles, onDelete = ReferenceOption.CASCADE).index()
}
The Users table has been extended with the role property, which establishes a relationship with the roles table. This addition allows us to assign specific roles to users, such as ADMIN or USER, enhancing the application's functionality by enabling role-based access control. To achieve this, we need to adhere to the guidelines provided by Exposed for creating Data Access Objects (DAOs). This involves refactoring existing classes and repositories to ensure they align with the new structure.
For accurate relation mapping between users and roles, we should utilize Entities that represent the actual rows in the database. This approach ensures that our data model accurately reflects the underlying database schema, making it easier to manage and query the data. To implement these changes, we will need to update our domain models and database schema. We will modify the User class to include a reference to the Role class. For more detailed information on how to create and manage DAOs with Exposed, you can refer to the official documentation here.
Roles.kt
class RoleEntity(id: EntityID<Int>) : IntEntity(id) {
    companion object : IntEntityClass<RoleEntity>(Roles)

    var name by Roles.name
}
Users.kt
class UserEntity(id: EntityID<UUID>) : UUIDEntity(id) {
   companion object : UUIDEntityClass<UserEntity>(Users)

    var name by Users.name
    var date_created by Users.date_created
    var username by Users.username
    var password by Users.password
    var role by RoleEntity referencedOn Users.role
}
Since we will now operate on the entities, the DAOFacade need to be adjusted accordingly. Instead of directly interacting with the database tables, we will perform all operations through the newly introduced entity objects.
First, we need to refactor the existing DAOFacade classes to replace any direct table access with entity-based operations. This involves updating the methods to use the entity objects for querying and manipulating data. For example, instead of writing a SQL query to fetch user data, we will use the UserEntity class to retrieve the user information. Similarly, for creating a new user, we will use the UserEntity class to insert the new record into the database.
RealUsersDAOFacade.kt
override suspend fun createUser(userRequest: UserRequest) = dbQuery {
    val userRoleId = requireNotNull(rolesDAOFacade.getIdByRole(Role.USER))

    UserEntity.new {
        name = userRequest.name
        username = userRequest.username
        password = userRequest.password
        date_created = Clock.System.now().toLocalDateTime(TimeZone.UTC).date.toString()
        role = RoleEntity[userRoleId]
    }.toUser()
}

override suspend fun getUsers(): List<User> = dbQuery {
    UserEntity.all().map { it.toUser() }
}
In summary, the transition to using entity objects for all database operations will streamline our data access logic, making it more consistent and easier to work with.
Role-based authentication
Once roles are implemented, the final step is to secure our routes effectively. With the JWT, we have ensured that our user is authenticated. Now, the roles will help us authorize the calls appropriately. To achieve this, we will add the role information to the JWT token. This way, each token will carry the user's role, allowing us to check permissions easily.
To integrate this into our application, we can create a custom KTOR plugin. This plugin will intercept incoming requests and verify the user's role against the required permissions for the route. If the user has the necessary role, the request will proceed; otherwise, it will be rejected with an appropriate error message.
If you want to read more about custom plugins, please check the docs
Adding the role to the JWT is a straightforward process. We will include the role information in the same section where we currently add the userId. This involves modifying the JWT creation logic to append the user's role alongside their unique identifier. By doing so, each token will carry both the userId and the role, ensuring that we have all the necessary information to authenticate and authorize users effectively.
val token = JWT.create()
 …
 .withClaim("userId", it.id)
 .withClaim("role", listOf(it.role.name))
 …
The plugin will rely on an authentication hook, which means that the code inside this hook will be executed after the user has been authenticated. From the authenticated call, we can easily obtain the decrypted JWT payload. By extracting the value of the role property from the payload, we can determine the user's permissions.
Next, we will create an extension function for the Route class. This extension function will be invoked with every endpoint call. The function will be called with a set of roles that are allowed to access a given endpoint. By doing this, we ensure that each endpoint specifies which roles are permitted to access it. The function will then install the authorization plugin and pass the required roles to it..
Finally, we can create a custom exception that will be thrown whenever an authorization error occurs. This custom exception will provide a clear and consistent way to handle authorization failures. By throwing this exception, we can ensure that users receive appropriate error messages when they attempt to access endpoints.
class AuthorizationException(
    route: String,
    val reasons: List<String>,
) : IllegalArgumentException("You don`t have access to $route. Reasons: ${reasons.joinToString()}")
internal class AuthorizationConfiguration {
    val requiredRoles: MutableSet<Role> = mutableSetOf()

    fun roles(roles: Set<Role>) {
        requiredRoles.addAll(roles)
    }
}
internal val RoleAuthorizationPlugin =
    createRouteScopedPlugin("RoleAuthorizationPlugin", ::AuthorizationConfiguration) {
        on(AuthenticationChecked) { call ->
            val principal = call.principal<JWTPrincipal>() ?: return@on
            val roles =
                principal
                    .payload
                    .getClaim("role")
                    .asList(String::class.java)
                    .map { Role.valueOf(it) }

            if (pluginConfig.requiredRoles.isNotEmpty() && roles.intersect(pluginConfig.requiredRoles).isEmpty()) {
                throw AuthorizationException(
                    route = call.request.path(),
                    reasons = listOf("You don`t have required role"),
                )
            }
        }
    }
fun Route.withRole(
    vararg roles: Role,
    build: Route.() -> Unit,
) {
    val route =
        createChild(
            object : RouteSelector() {
                override fun evaluate(
                    context: RoutingResolveContext,
                    segmentIndex: Int,
                ): RouteSelectorEvaluation {
                    // Transparent selector means that it does not consume anything from the URL, so child routes can match.
                    return RouteSelectorEvaluation.Transparent
                }
            },
        )

    route.install(RoleAuthorizationPlugin) {
        roles(roles.toSet())
    }

    route.build()
}
There is nothing more left to do but to apply the freshly created plugin to our routes. Let's update the users' routing to include this new plugin. By doing this, we ensure that only users with the appropriate roles can access certain routes. This adds an extra layer of security and control over who can perform specific actions within our application. Here's how we can update the users' routing to incorporate the role-based authorization plugin:
fun Route.usersRouting() {
    val repo by inject<DatabaseUsersRepository>()

    authenticate("jwt-auth") {
        withRole(Role.ADMIN) {
            route(“/users”) {
      }
    }
}
With everything set up, we can test it with HTTP requests from the LoginRequests.http test. If we try to request users from an account other than admin, we should see the proper message:
GET http://0.0.0.0:8080/users

HTTP/1.1 401 Unauthorized

You don`t have required role
The last thing that needs to be done is returning the role to the clients.
By providing the role to the frontend application, we can show different UI elements, restrict access to certain screens, and control functionalities based on the user's role.
To achieve that we need to add the User property to the LoginResponse. When we are creating the login response, we already have the user data fetched from the DB.
@Serializable
data class LoginResponse(
    @SerialName("token")
    val token: String,
    @SerialName("user")
    val user: User,
)
Our backend is up and running with basic functionalities. Now we need to switch our focus to the front-end applications. In the next blog post, I will add the KTOR client to the shared module that can be used by front-end applications (Android, iOS, and Web).
This article provides a comprehensive guide to setting up routing for a GameShop application using KTOR, incorporating domain models, repositories, and role-based authorization. It covers the initial configuration of routing to fetch games, the creation of shared and server-specific modules for domain models, implementing repositories with database interactions, and integrating JWT authentication with role-based access control. Additionally, it details how to update data access logic to utilize entity objects and how to enable role-based authorization in the backend to enhance security and functionality. Future posts will address integrating the KTOR client into front-end applications.